Setup Android Hacking Lab on Arch Linux With Frida and Burpsuite
Iseng-iseng aja sebenere (nganggur), dan mungkin android hacking ini salah satu yg blm pernah kuexplore langsung, palingan cmn pernah main CTF challenge, itupun cmn static analysis, so ya pgn nyoba deepdive aja.
Rooting AVD
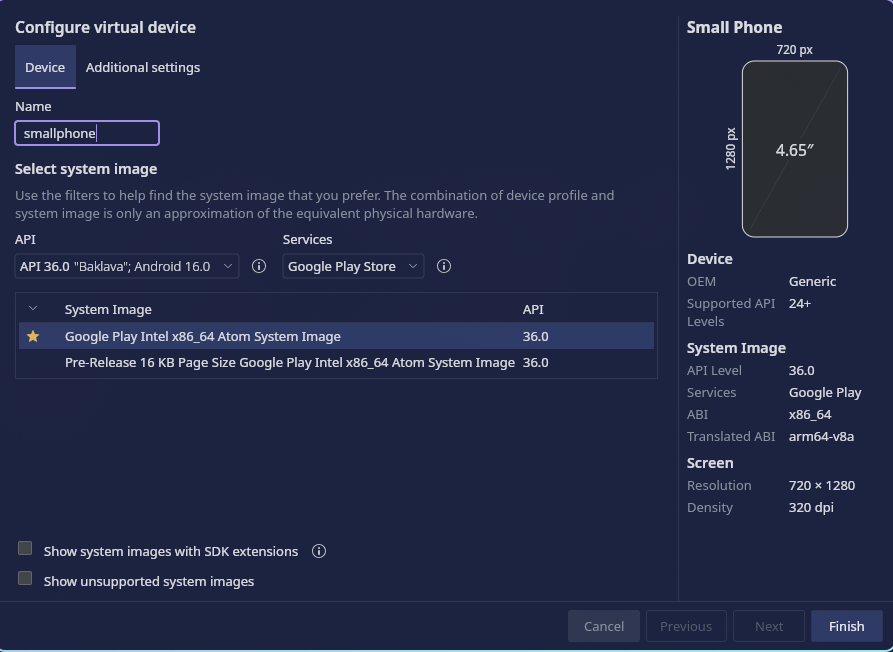
Open Virtual Devices Manager, click + Button, then choose Android type (i choose Small phone), then choose Android API version (i choose API 36), then click finish.
After that, we change the default Quick Boot into Cold Boot. Click three dots on the right AVD. After that click Snapshots -> Settings, and in Auto-save current state to Quickboot change it from Yes into No. Why we change quickboot into coldboot, thats for saving snapshot in coldboot.
Then makesure adb is installed and open a terminal.
❯ adb devices
List of devices attached
emulator-5554	device

❯ adb shell
emu64xa:/ $ whoami
shell
emu64xa:/ $ su
/system/bin/sh: su: inaccessible or not found
127|emu64xa:/ $
System isnt rooted. So install rootAVD first, and after that, run the bash script.
./rootAVD.sh
./rootAVD.sh ListAllAVDs
./rootAVD.sh system-images/android-36/google_apis_playstore/x86_64/ramdisk.img
Connecting Android Emulator with Burpsuite
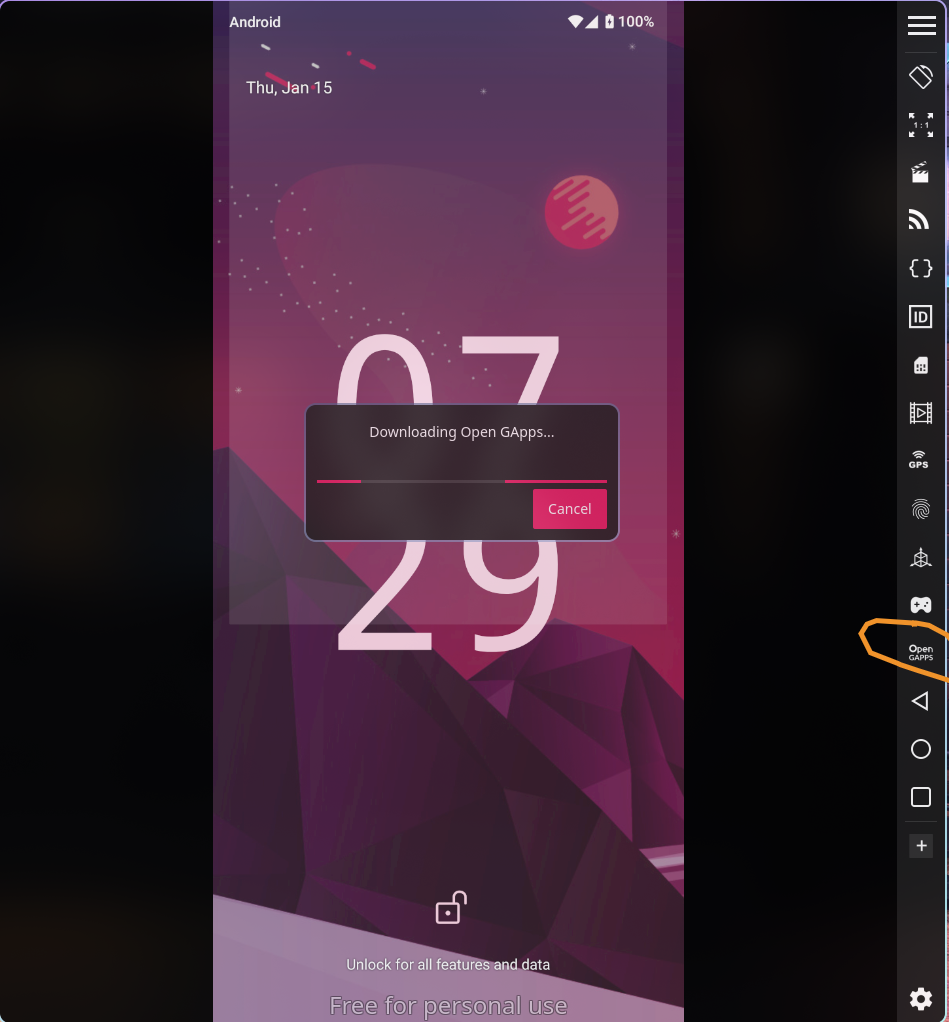
Auto-install Google-Play Services, click Open GApss button on right bar of emulator, after that click Accept, and just wait until the installation is completed.
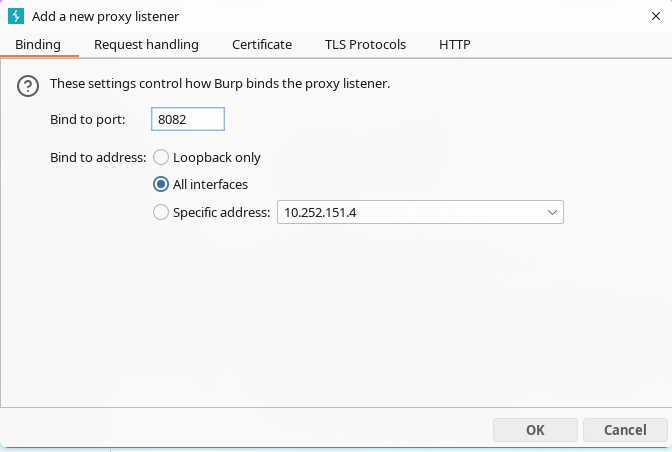
After successfully installed Open GApps, click Restart Now. After that, open Burpsuite, and open Proxy -> Proxy Settings. In Proxy listeners column, Add listener with 8082 port, and in Bind to address choose All interfaces.
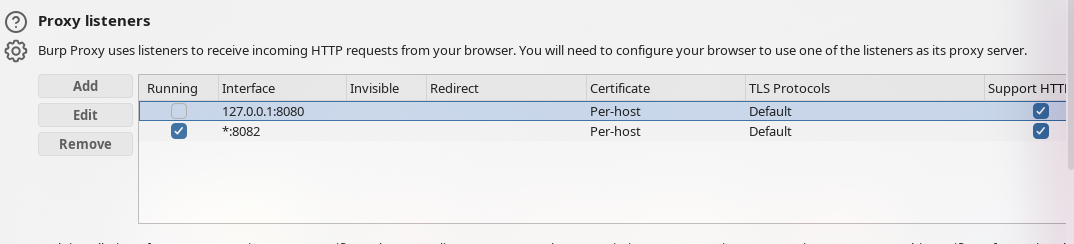
And checklist the new Proxy listener like this.
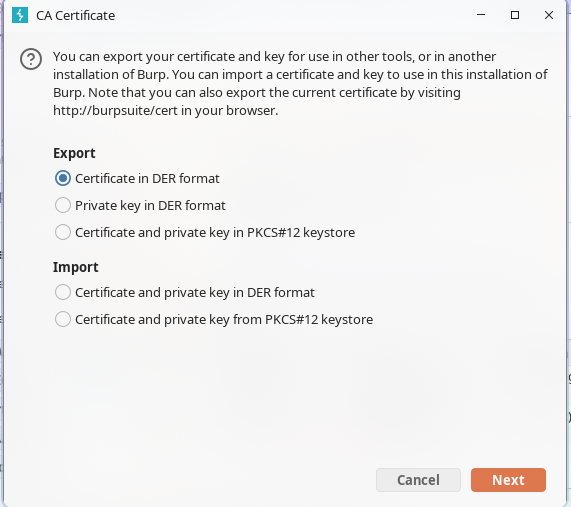
Click Import / export CA certificate, in Export column click Certificate in DER format.
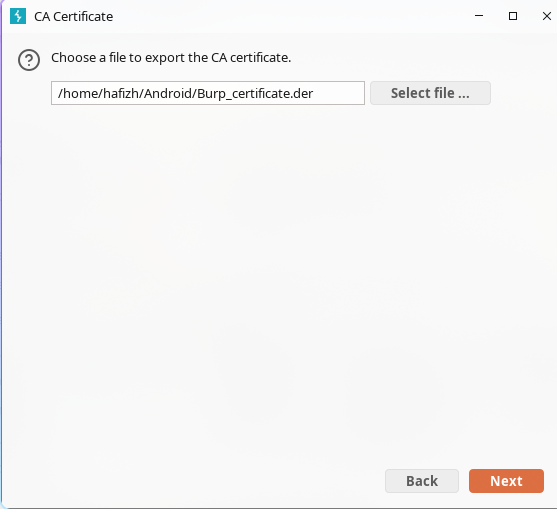
Select file location.
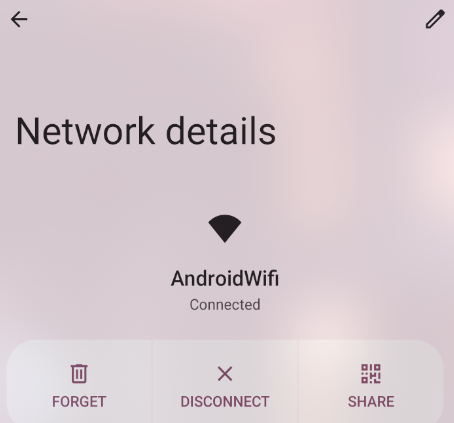
Add the proxy in Android EMulator. Click the wifi icon, then click the pencil icon in top right.
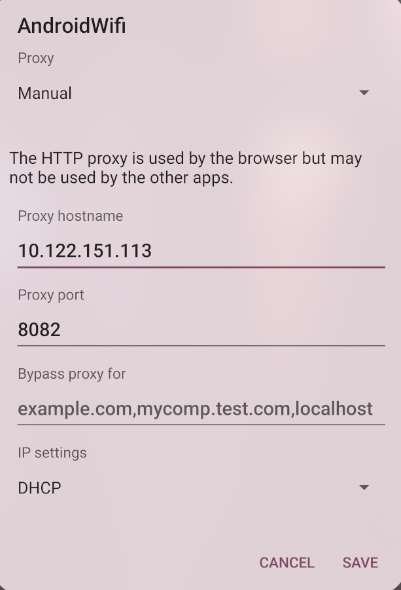
Under Proxy column, choose Manual, and input Device IP and 8082 port.
Open terminal, makesure adb is completely installed on your device.
adb devices
adb connect 127.0.0.1:6555
adb shell settings put global http_proxy localhost:3333